Brewing 1-gallon batches is like learning to cook on a single burner: low risk, low cost, and very forgiving. You’ll learn the motions, see the fermentation up close, and make mistakes without wasting a kitchen full of ingredients.
Why Start With a 1-Gallon Batch?
This guide walks you step-by-step through a simple 1-gallon ale, explains what’s happening microbiologically at each stage, and points out common pitfalls before they happen.
Equipment Checklist (What You Really Need)
You don’t need a fancy setup. Here’s the minimum:
- 1 medium stock pot (8–10 quarts)
- 1-gallon glass jug (fermenter) with stopper and airlock
- Kitchen thermometer (instant-read is ideal)
- Fine mesh strainer
- Funnel (sanitizable, wide-mouth if possible)
- Siphon tubing (food-grade) or an auto-siphon
- Hydrometer (optional but very helpful)
- Bottles (ten to twelve 12-oz bottles or equivalent)
- Bottle caps and capper (or swing-top bottles)
- No-rinse sanitizer (e.g., Star San or similar)
If you don’t have everything yet, don’t worry. You can build your kit slowly—just like building up a good spice cabinet.
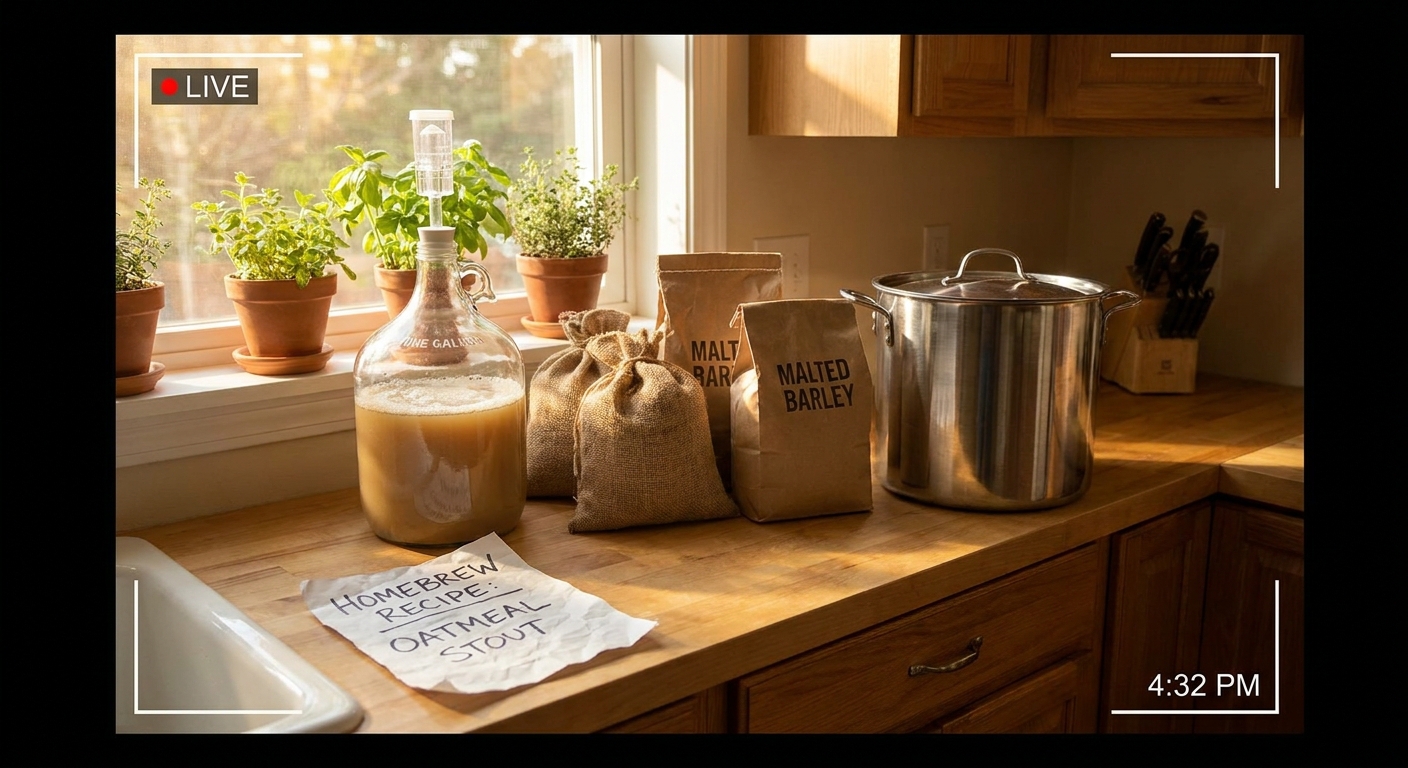
Ingredients for a Simple 1-Gallon Ale
This recipe makes a straightforward, malt-forward ale that ferments cleanly and quickly.
- 1.3 kg (3 lb) light dry malt extract or ~1.8 kg (4 lb) liquid malt extract
- 14 g (0.5 oz) low- to medium-bittering hops (like Cascade, Willamette, or Fuggles)
- 7 g (0.25 oz) aroma hops (same or complementary variety)
- 1 packet ale yeast (Safale US-05 or similar); you’ll use ~1/3 of the packet
- Optional: 50–75 g (2–3 oz) of specialty grains (crystal malt) for extra flavor
Step 1: Sanitation – Protecting Your Yeast
Time: 20–30 minutes
Yeast are peaceful, slow eaters. Many bacteria are aggressive sprinters. Sanitizing helps give your yeast the head start they need.
Clean first
- Wash all equipment that will touch the cooled wort (unfermented beer): fermenter, airlock, stopper, funnel, strainer, siphon, hydrometer, etc. - Use unscented dish soap and a non-scratch sponge. Rinse thoroughly.
Sanitize
- Mix your no-rinse sanitizer according to the instructions (usually about 1 oz in 5 gallons water; scale down as needed). - Soak the fermenter, airlock, stopper, funnel, and any small parts for the recommended contact time (often 1–2 minutes). - Let them drain on a clean rack or towel. Don’t rinse them.
Microbiology Moment: Why Sanitation Matters
Your malt extract is a feast of simple sugars, amino acids, and minerals—perfect not just for yeast but also lactic acid bacteria and wild yeasts. Boiling kills most organisms, but anything landing in your wort after the boil can grow. Sanitizing equipment dramatically reduces these unwanted guests so your chosen yeast dominates the environment.
Step 2: Steeping (If Using Specialty Grains)
Time: 20–30 minutes
If you’re using crystal or specialty grains, now’s the time.
- Heat 2.5–3 quarts (2.5–3 L) of water to 68–71°C (155–160°F).
- Place crushed grains in a mesh bag or loose in the pot (you’ll strain later).
- Steep for 20 minutes, keeping the temperature in that range. Don’t boil.
- Remove grain bag or strain the grains out. Do not squeeze the grains hard; a gentle press is fine.
This step pulls out color, flavor, and unfermentable sugars that add body.
Step 3: The Boil – Building Bitterness and Sterility
Time: 60 minutes
- Add your malt extract off the heat and stir thoroughly to avoid scorching.
- Top up with water to ~3–3.5 quarts (3–3.5 L) total volume in the pot.
- Return to the stove and bring to a gentle rolling boil.
Hop Schedule (Basic 60-Minute Boil)
- 60 minutes left: Add 14 g (0.5 oz) bittering hops.
- 5 minutes left: Add 7 g (0.25 oz) aroma hops.
These hops provide most of your beer’s bitterness.
These contribute flavor and aroma that boil off quickly if added earlier.
Watch for boil-overs, especially right after the boil starts. Lower the heat slightly or remove the pot briefly if foam climbs too high.
Microbiology Moment: The Boil’s Hidden Jobs
- Sterilization: Boiling kills microbes present in the extract and hops.
- Hop Isomerization: Heat rearranges hop alpha acids into a more bitter, water-soluble form.
- Protein Coagulation (Hot Break): Proteins clump and fall out, helping clarity and stability later.
Step 4: Cooling the Wort
Time: 30–45 minutes (ice bath) or 15–20 minutes (immersion chiller)
You want to cool the wort from boiling to about 18–21°C (65–70°F) as quickly as you can.
- Fill your sink or a large tub with cold water and ice.
- Carefully place the covered pot into the bath.
- Stir the wort gently with a sanitized spoon to speed cooling (lid slightly cracked, not wide open).
- Replace the ice if it melts.
Rapid cooling reduces the time the wort hangs out in the “microbial danger zone” (around 30–45°C / 86–113°F), where contaminants grow fast.
Step 5: Transfer to Fermenter and Pitch Yeast
Time: 20–30 minutes
- Sanitize again: Make sure your fermenter, funnel, airlock, and stopper are sanitized.
- Pour the cooled wort through a sanitized strainer and funnel into the fermenter. This aerates the wort and catches hop debris.
- Top up with cool, clean water to reach 1 gallon (3.8 L).
- If using a hydrometer, take an original gravity (OG) reading now.
Pitching the Yeast
- Sprinkle ~1/3 packet of dry ale yeast onto the surface of the wort. No need to stir; they’ll hydrate and sink.
- Fit the stopper and fill the airlock with sanitizer solution or boiled water.
- Insert the airlock into the stopper.
Microbiology Moment: Yeast Wake-Up Call
Once pitched, yeast go through:
- Lag phase (0–12 hours): They hydrate, repair cell membranes, and begin taking up oxygen and nutrients.
- Exponential growth (1–3 days): Yeast multiply rapidly, consuming simple sugars, producing CO₂ and ethanol.
- Stationary phase (3–10 days): Sugar levels drop, yeast slow down, and clean up byproducts like diacetyl (buttery flavor) and acetaldehyde (green apple).
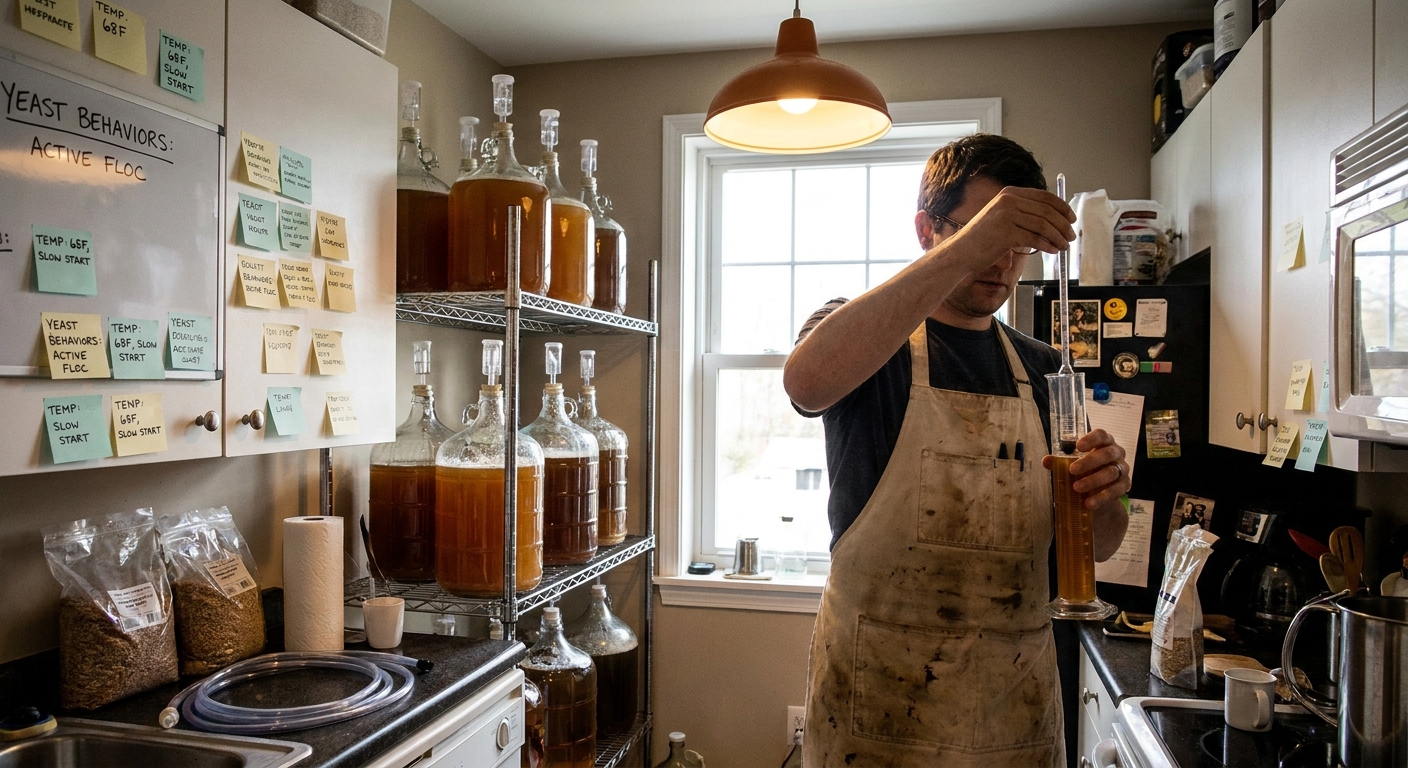
Step 6: Fermentation Management
Total time: 10–14 days
- Place the fermenter in a dark, temperature-stable spot at 18–21°C (65–70°F).
- Within 12–36 hours, you should see bubbling in the airlock and a foam layer (krausen) on top of the beer.
- Keep the temperature as steady as possible; fluctuations can stress yeast.
Visual Timeline
- Day 1–3: Rapid bubbling, thick krausen, cloudy beer.
- Day 4–7: Bubbling slows, krausen recedes.
- Day 8–14: Little visible activity, beer clears as yeast flocculate (settle to the bottom).
Even if bubbling stops early, let the beer sit at least 10 days. Yeast need time to “polish” the beer.
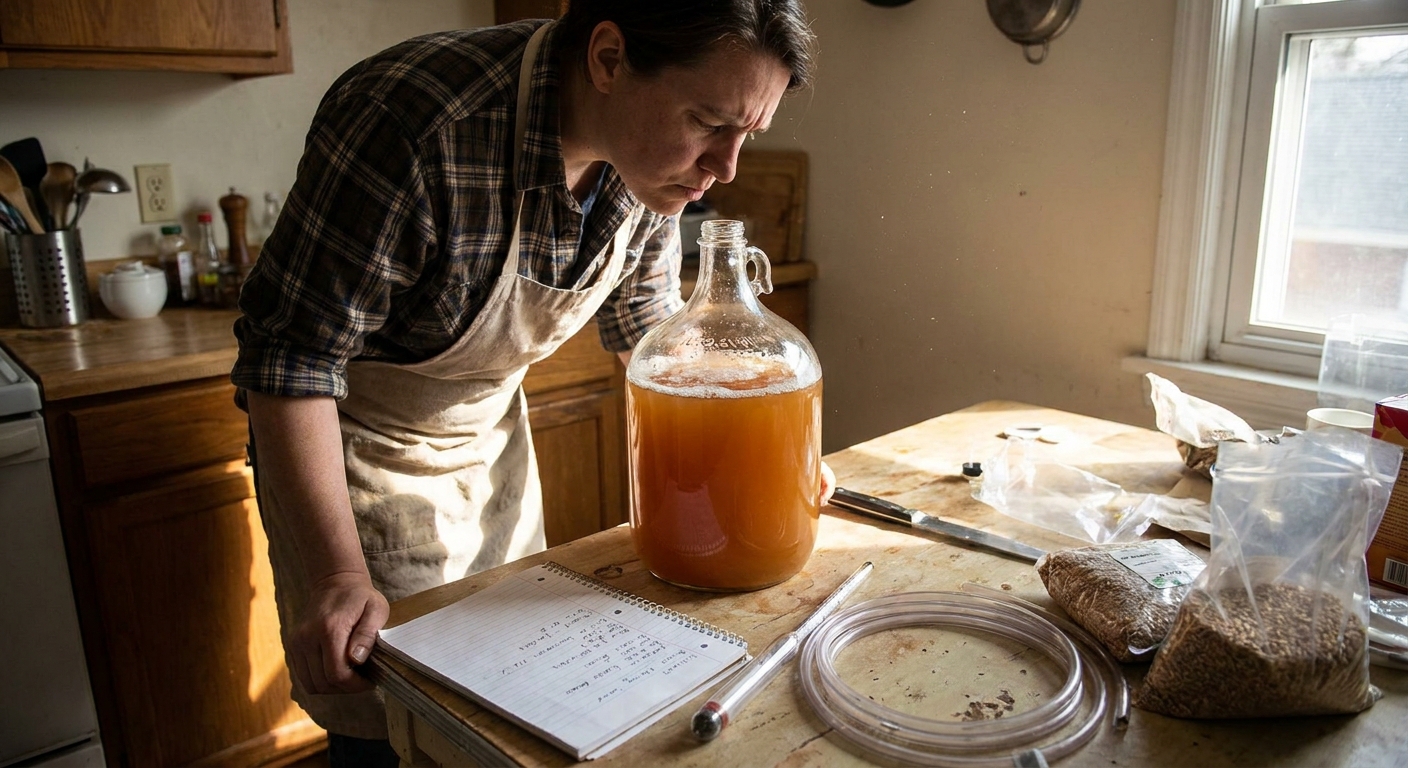
Step 7: Bottling and Carbonation
Time: 1–2 hours, plus 10–14 days conditioning
- Ensure fermentation is complete (stable gravity readings 2–3 days apart, or at least 10–14 days since pitching).
- Sanitize bottles, caps, siphon, and any tubing.
Priming Sugar
For 1 gallon, you’ll typically use:
- 18–22 g (0.6–0.8 oz) table sugar (approx. 1.5–2 tsp) dissolved in a small amount of boiled water.
- Add the cooled sugar solution to a sanitized bottling vessel (or very gently to the fermenter if you don’t have a separate vessel).
- Siphon the beer onto the sugar solution, creating gentle mixing without splashing (oxygen at this stage can cause staling).
- Fill bottles, leaving about 2.5 cm (1 inch) headspace.
- Cap and store at room temperature (18–24°C / 65–75°F).
Microbiology Moment: Second Fermentation
The yeast are not completely done. In the bottle, they ferment the small amount of priming sugar, producing a little more ethanol and CO₂, which dissolves into the beer and creates natural carbonation.
- Conditioning time: 10–14 days, often longer for full flavor development.
Chill a bottle for 24 hours before opening to allow CO₂ to dissolve fully.
Common Problems and Gentle Fixes
1. No Bubbles in the Airlock
- Possible causes: Loose lid/stopper, temperature too low, old yeast.
- Check: Look for krausen or a ring on the fermenter wall—fermentation may be happening without visible bubbling.
- Fix: If truly inactive after 48 hours and no signs of fermentation, gently warm to 20–22°C (68–72°F). If still nothing, pitch fresh yeast.
2. Sour or Vinegary Smell
- Likely cause: Bacterial contamination (e.g., acetic acid bacteria).
- Prevention: Better sanitation, minimize oxygen exposure post-fermentation.
- Salvage: If it’s slightly tart and not unpleasant, you’ve accidentally brewed something like a sour. If it’s harsh vinegar, chalk it up as a learning batch.
3. Stuck Fermentation (High Final Gravity)
- Causes: Yeast pitched too warm/hot, under-pitching, or temperature drops.
- Fix: Gently swirl the fermenter to resuspend yeast and move to a slightly warmer place (up to 22–23°C / 72–73°F). If no change, pitch a small amount of fresh, active yeast.
Tasting and Taking Notes
When your beer is carbonated:
- Pour gently into a clean glass, leaving the yeast sediment behind.
- Note appearance, aroma, flavor, mouthfeel, and any off-notes.
- Write down what you did this batch (temps, times, ingredients) and what you’d like to change next time.
This is how homebrewers improve: one careful, curious batch at a time.
Where to Go Next
- Try different hops at the late-boil stage for new aromas.
- Adjust specialty grains for color and sweetness.
- Experiment with different yeasts to see how they change the profile.
Once you’re comfortable with this 1-gallon process, scaling to 3 or 5 gallons is mostly about larger pots and heavier lifting—the science and the patience stay the same.